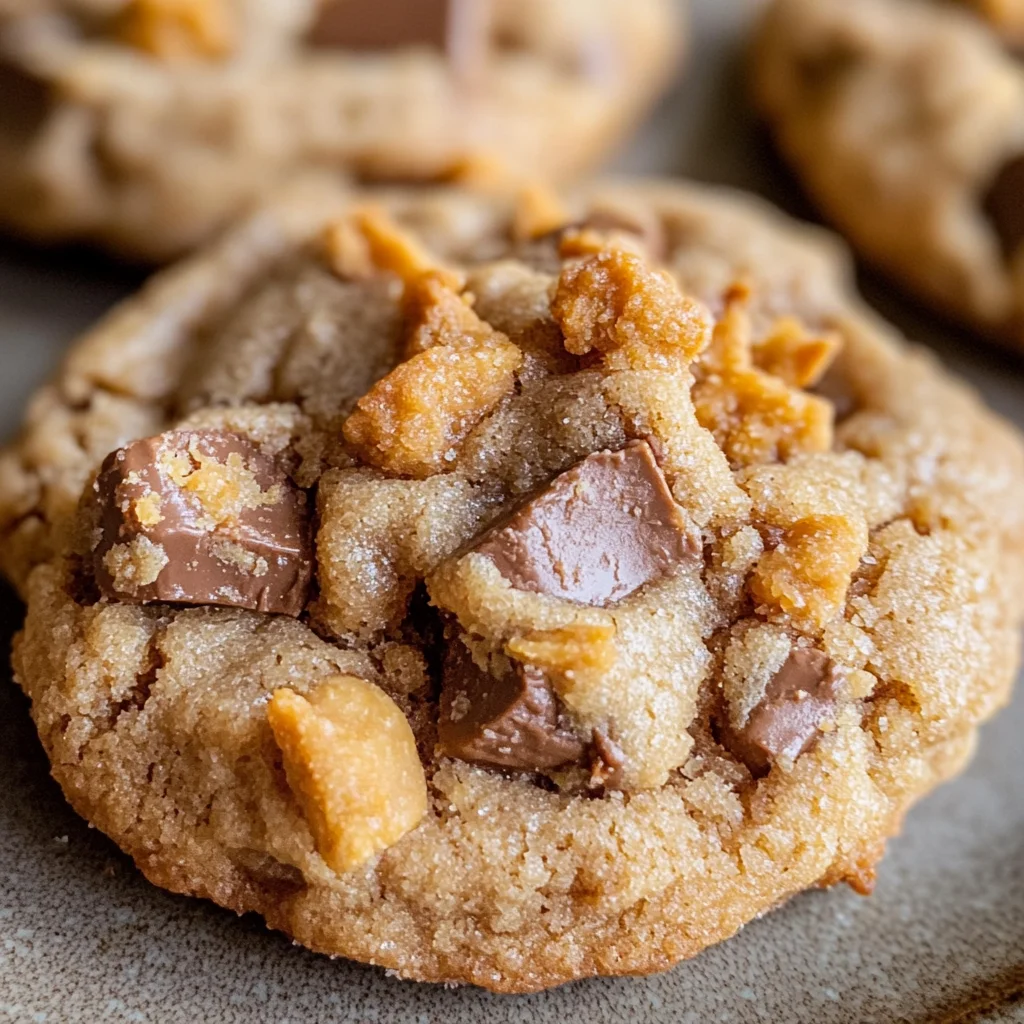
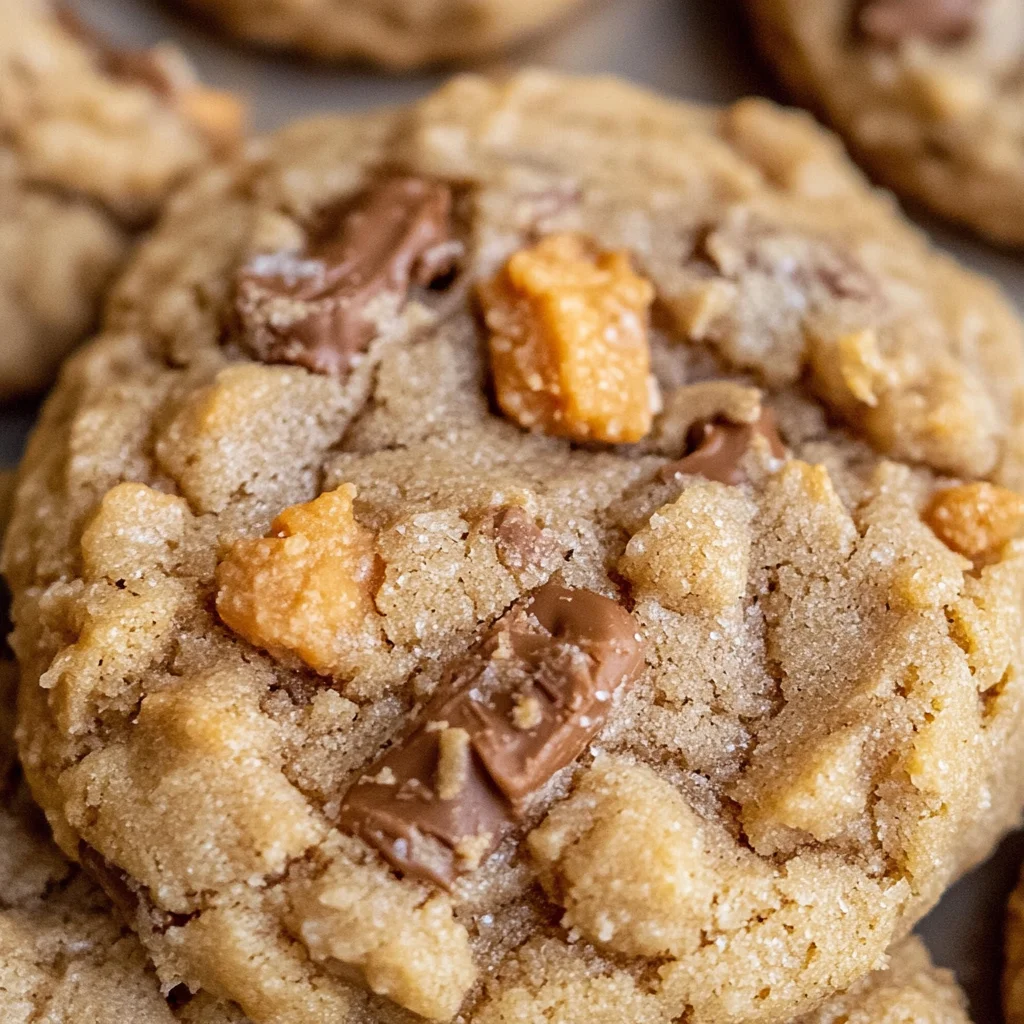
Peanut Butter Butterfinger Cookies
These Peanut Butter Butterfinger Cookies are a game-changer! Imagine biting into a delightfully soft and thick peanut butter cookie, bursting with crispety, crunchety bits of Butterfinger. Perfect for any occasion, these cookies will impress friends and family alike. Their unique flavor and irresistible texture make them a standout dessert that you’ll want to bake again and again.
Why You’ll Love This Recipe
- Incredible Flavor: The combination of rich peanut butter and crunchy Butterfinger creates a mouthwatering taste sensation.
- Easy to Make: With simple steps and common ingredients, you can whip up these cookies in no time.
- Perfect for Sharing: Whether it’s a party or a family gathering, these cookies are sure to be a hit!
- Versatile Treat: Great for any time of year—holidays, birthdays, or just because!
- Freezer Friendly: You can prepare the dough ahead of time or freeze baked cookies for later enjoyment.
Tools and Preparation
To make these delicious Peanut Butter Butterfinger Cookies, you’ll need some essential kitchen tools. Having the right equipment makes the process smoother and more enjoyable.
Essential Tools and Equipment
- Stand mixer or large mixing bowl
- Cookie scoop or tablespoon
- Baking sheets
- Parchment paper or silicone baking mats
- Measuring cups and spoons
Importance of Each Tool
- Stand mixer: Makes it easy to blend ingredients thoroughly without much effort.
- Cookie scoop: Ensures uniform cookie sizes for even baking.
- Baking sheets: Provides a sturdy base for baking your cookies evenly.
Ingredients
These Peanut Butter Butterfinger Cookies are unreal! I thought Peanut Butter Cookies couldn’t get any better…But then I added chopped up Butterfinger bits and my life changed forever! A delightfully soft and THICK peanut butter cookie with crispety, crunchety, peanut-buttery bits that make it taste like a peanut brittle cookie.
Ingredients:
– 3/4 cup butter (softened (1 and 1/2 sticks))
– 1/2 cup granulated sugar
– 1/2 cup brown sugar (packed)
– 1 cup peanut butter (don’t use natural pb)
– 1 large egg
– 1 & 1/2 teaspoons vanilla
– 1 & 1/2 cups all-purpose flour (spooned and leveled)
– 1/2 teaspoon baking soda
– 1/2 teaspoon baking powder
– 1/4 teaspoon kosher salt
– 16 ounces butterfinger (chopped)
How to Make Peanut Butter Butterfinger Cookies
Step 1: Cream the Butters
In a large bowl or stand mixer, beat 3/4 cup softened butter until it is smooth and creamy, scraping the sides of the bowl.
Step 2: Mix in Sugars
Add 1/2 cup granulated sugar and 1/2 cup packed brown sugar. Beat well for about 2 minutes until fluffy, ensuring there are no chunks of butter.
Step 3: Add Peanut Butter
Mix in 1 cup peanut butter until well combined. I prefer using Jif as it gives the best flavor!
Step 4: Incorporate Egg and Vanilla
Add in one large egg and 1 & 1/2 teaspoons vanilla. Beat until fully combined while scraping down the sides occasionally.
Step 5: Combine Dry Ingredients
Add in the flour carefully. Don’t stir yet! On top of the flour, add in your baking soda, baking powder, and kosher salt. Use a teaspoon to combine the dry ingredients lightly.
Step 6: Mix Dough Together
Turn on the mixer to blend everything together gently. Once it begins to come together but is still slightly crumbly, stop mixing. Over-mixing can lead to tough cookies!
Step 7: Fold in Butterfingers
Gently fold in your chopped Butterfinger pieces until they are just incorporated into the dough.
Step 8: Chill Dough
Cover your dough bowl with plastic wrap and chill it for at least 15 minutes up to an hour (or even longer if desired).
Step 9: Preheat Oven
While your dough chills, preheat your oven to 350 degrees F. Line two baking sheets with parchment paper or silicone mats.
Step 10: Shape Cookies
Scoop out dough balls using your cookie scoop or tablespoon; shape them into approximately two-inch balls.
Step 11: Bake
Place each ball on your prepared baking sheet at least an inch apart from each other. Bake at 350°F for about ten minutes.
Step 12: Cool Down
Let them set on the pan for at least five minutes before transferring them to a wire rack to cool completely.
Enjoy these amazing Peanut Butter Butterfinger Cookies as they offer a delightful treat perfect for all occasions!
How to Serve Peanut Butter Butterfinger Cookies
Serving Peanut Butter Butterfinger Cookies can elevate your dessert experience. Here are some delightful ways to enjoy these cookies that will surely impress your family and friends.
With a Glass of Milk
- Pairing these cookies with a cold glass of milk is classic. The creamy taste balances the sweetness perfectly.
Ice Cream Sandwiches
- Create delicious ice cream sandwiches by placing a scoop of your favorite vanilla or chocolate ice cream between two cookies. This combo brings a delightful contrast in textures.
Drizzled with Chocolate Sauce
- Drizzling warm chocolate sauce over the cookies adds an extra layer of indulgence. It enhances the peanut butter flavor beautifully.
As Part of a Dessert Platter
- Arrange your Peanut Butter Butterfinger Cookies on a dessert platter alongside other treats like brownies or fruit tarts for a colorful, varied selection.
With Fresh Fruit
- Serve these cookies with fresh slices of apple or banana. The fruit adds freshness and complements the richness of the cookies.
How to Perfect Peanut Butter Butterfinger Cookies
Perfecting your Peanut Butter Butterfinger Cookies is all about technique and timing. Follow these tips for an unbeatable cookie experience.
- Use Room Temperature Ingredients: Make sure your butter and egg are at room temperature for better mixing and texture.
- Don’t Overmix the Dough: Mix until just combined to keep the cookies soft and chewy.
- Chill the Dough: Allowing the dough to chill before baking helps prevent spreading, resulting in thicker cookies.
- Measure Flour Accurately: Spoon flour into your measuring cup instead of scooping it directly to avoid dense cookies.
- Flatten Slightly Before Baking: Gently press down on each cookie before baking for an even spread and perfect shape.
- Store Properly: Keep leftover cookies in an airtight container to maintain their freshness and softness.
Best Side Dishes for Peanut Butter Butterfinger Cookies
These Peanut Butter Butterfinger Cookies pair wonderfully with various side dishes that complement their rich flavors. Here’s a list of great accompaniments to consider:
- Vanilla Ice Cream: A scoop of creamy vanilla ice cream balances the sweetness and adds a cool contrast.
- Fresh Berries: Ripe strawberries or blueberries provide a tartness that cuts through the sweetness of the cookies.
- Nutty Granola: A small serving of granola adds crunch and enhances the peanut butter flavor, making it a delightful pairing.
- Chocolate Milkshake: This indulgent drink pairs perfectly with cookies, making for a satisfying dessert experience.
- Homemade Whipped Cream: Light whipped cream can be dolloped on top for an extra creamy touch that complements each bite.
- Fruit Salad: A refreshing fruit salad can cleanse the palate and add some nutrition alongside your sweet treats.
- Coffee or Tea: A warm cup of coffee or tea enhances the cookie’s flavors while providing a comforting drink option.
Common Mistakes to Avoid
When baking Peanut Butter Butterfinger Cookies, it’s easy to make some common mistakes that can affect the final result.
- Not measuring ingredients correctly: Accurate measurements are crucial for achieving the perfect texture. Use a kitchen scale or proper measuring cups to ensure precision.
- Overmixing the dough: Mixing too long can lead to tough cookies. Stop mixing once the dough starts to come together and you see a few flour streaks.
- Skipping the chilling step: Chilling the dough helps improve flavor and texture. Even a short chill of 15 minutes makes a difference, so don’t skip it!
- Using natural peanut butter: Natural peanut butter contains oils that can alter cookie consistency. Stick to regular peanut butter for best results.
- Ignoring baking time: Keep an eye on the cookies as they bake. They should be set at the edges and slightly puffy in the center; don’t wait for them to look fully cooked before taking them out.
Storage & Reheating Instructions
Refrigerator Storage
- Store leftover cookies in an airtight container.
- They will stay fresh for up to 3 days in the refrigerator.
Freezing Peanut Butter Butterfinger Cookies
- Place cookie dough balls in a ziplock bag and freeze for up to 3 months.
- Baked cookies can also be stored in a sealed container for up to 4 weeks.
Reheating Peanut Butter Butterfinger Cookies
- Oven: Preheat to 350°F, then bake cookies for 2-3 minutes until warm.
- Microwave: Heat individual cookies for about 10-15 seconds until just warm; avoid overheating.
- Stovetop: Place cookies in a pan over low heat, flipping occasionally until warmed through.
Frequently Asked Questions
Here are some common questions about making Peanut Butter Butterfinger Cookies.
Can I use crunchy peanut butter instead of creamy?
You can use crunchy peanut butter if you prefer extra texture. It will still yield delicious cookies!
How do I store leftover Peanut Butter Butterfinger Cookies?
Store them in an airtight container at room temperature for up to 3 days or refrigerate them for longer freshness.
Can I make these cookies without Butterfinger?
Yes! You can substitute with other candies like chocolate chips or chopped nuts if desired.
How do I know when my cookies are done baking?
The edges should be set and not shiny in the middle. They should look puffy and slightly spread out.
Are these cookies customizable?
Absolutely! Feel free to add your favorite mix-ins like chocolate chips, or change up the candy used for different flavors.
Final Thoughts
Peanut Butter Butterfinger Cookies are a delightful treat that combines soft, thick cookie goodness with crispy candy bits. These cookies are perfect for any occasion and can easily be customized with different mix-ins or toppings. Give this recipe a try, and enjoy the delightful fusion of flavors!
Peanut Butter Butterfinger Cookies
Peanut Butter Butterfinger Cookies are a delightful twist on a classic favorite, blending the rich flavor of peanut butter with the crunch of Butterfinger candy bits. These soft, thick cookies are incredibly easy to make and perfect for any occasion, whether it’s a family gathering or just a treat for yourself. Each bite delivers a mouthwatering combination of textures, making them an instant crowd-pleaser. Plus, they can be made ahead of time or frozen for later enjoyment, ensuring you always have a sweet treat ready to go.
- Prep Time: 15 minutes
- Cook Time: 10 minutes
- Total Time: 25 minutes
- Yield: About 24 servings 1x
- Category: Dessert
- Method: Baking
- Cuisine: American
Ingredients
- 3/4 cup softened butter
- 1/2 cup granulated sugar
- 1/2 cup packed brown sugar
- 1 cup peanut butter (not natural)
- 1 large egg
- 1 & 1/2 teaspoons vanilla extract
- 1 & 1/2 cups all-purpose flour
- 1/2 teaspoon baking soda
- 1/2 teaspoon baking powder
- 1/4 teaspoon kosher salt
- 16 ounces chopped Butterfinger candy
Instructions
- Preheat your oven to 350°F and line two baking sheets with parchment paper.
- In a large bowl, cream together the softened butter, granulated sugar, and brown sugar until fluffy.
- Mix in the peanut butter until fully combined.
- Add the egg and vanilla extract; beat until creamy.
- Gradually incorporate the flour, baking soda, baking powder, and salt until just combined.
- Gently fold in the chopped Butterfinger candy pieces.
- Scoop dough into balls (about two inches) and place on the prepared baking sheets.
- Bake for approximately 10 minutes or until edges are set but centers remain soft.
- Allow cookies to cool on the pan for five minutes before transferring them to a wire rack.
Nutrition
- Serving Size: 1 cookie (30g)
- Calories: 150
- Sugar: 10g
- Sodium: 75mg
- Fat: 8g
- Saturated Fat: 4g
- Unsaturated Fat: 3g
- Trans Fat: 0g
- Carbohydrates: 17g
- Fiber: <1g
- Protein: 3g
- Cholesterol: 15mg